Negatives in to Positives: Fun with a cheap transparency scanner
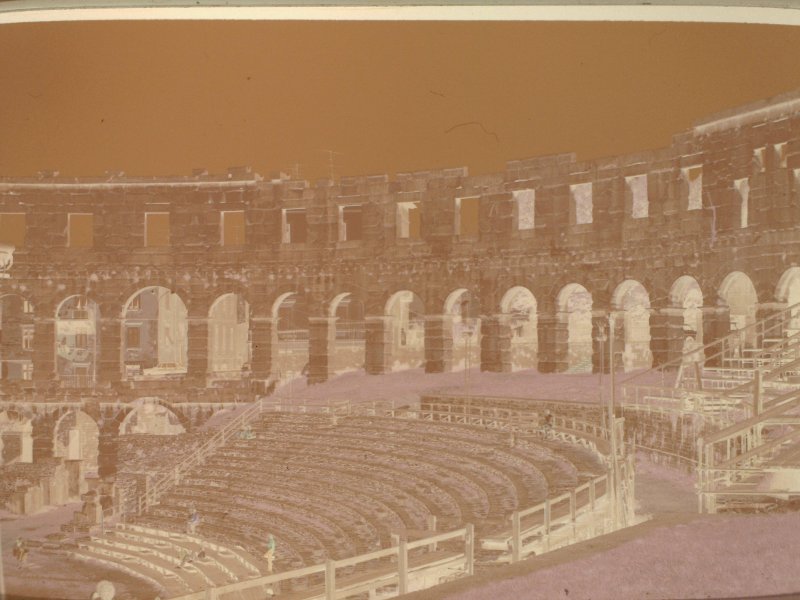
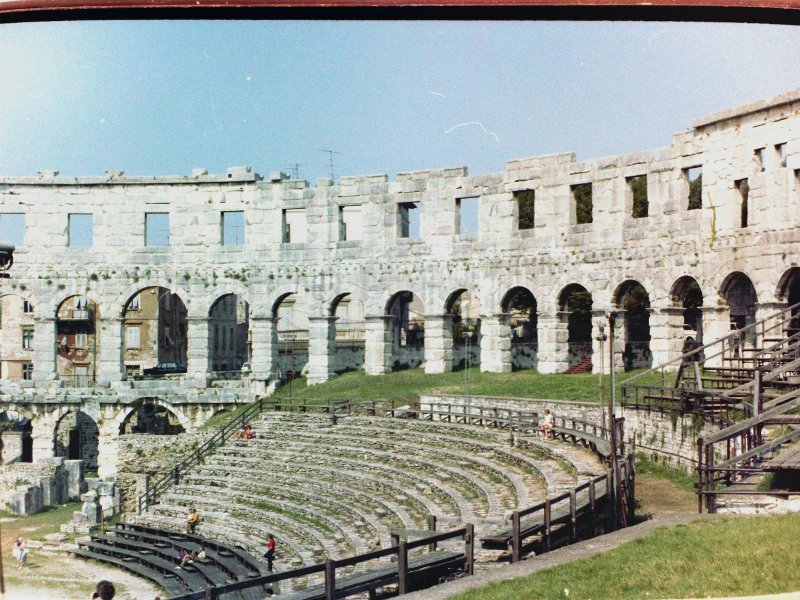
The Arena, Pula, Istria County, Croatia (previously Yugoslavia). Taken in the summer of 1981 with an all manual Zenit camera.
On a recent visit to the local Maplin's store (a retailer of electronic gadgets and components in the U.K. - a
bit like Radio Shack of old) we saw a no-name "transparency scanner" on sale with a hefty discount for £25 (stock code N16JA -
although I suspect it won't be around much after June 2012). I have
a shoebox full of negatives from donkey's years ago and have often thought of scanning them in. So ... we
bought it.
Unfortunately, installing the bloatware that came with it for Windows on my wife's PC resulted in a less than
satisfactory result: no images! At this point we could have taken it back of course. But we had alternatives in
the way of computers, so I plugged it in to a laptop running Ubuntu just to see what it made of it.
Well, it wasn't recognized as a scanner (which might be accessible via SANE, for example). That is because it is
really a high resolution webcam. Once that had sunk in, it was easy to get images from it. The cheese
program proved most satisfactory.
But I had negatives to "scan" (for the most part) ... not positives. Grabbing images via cheese captured negatives
in all their orange glory, of course! Something needed to be done to convert them to positives.
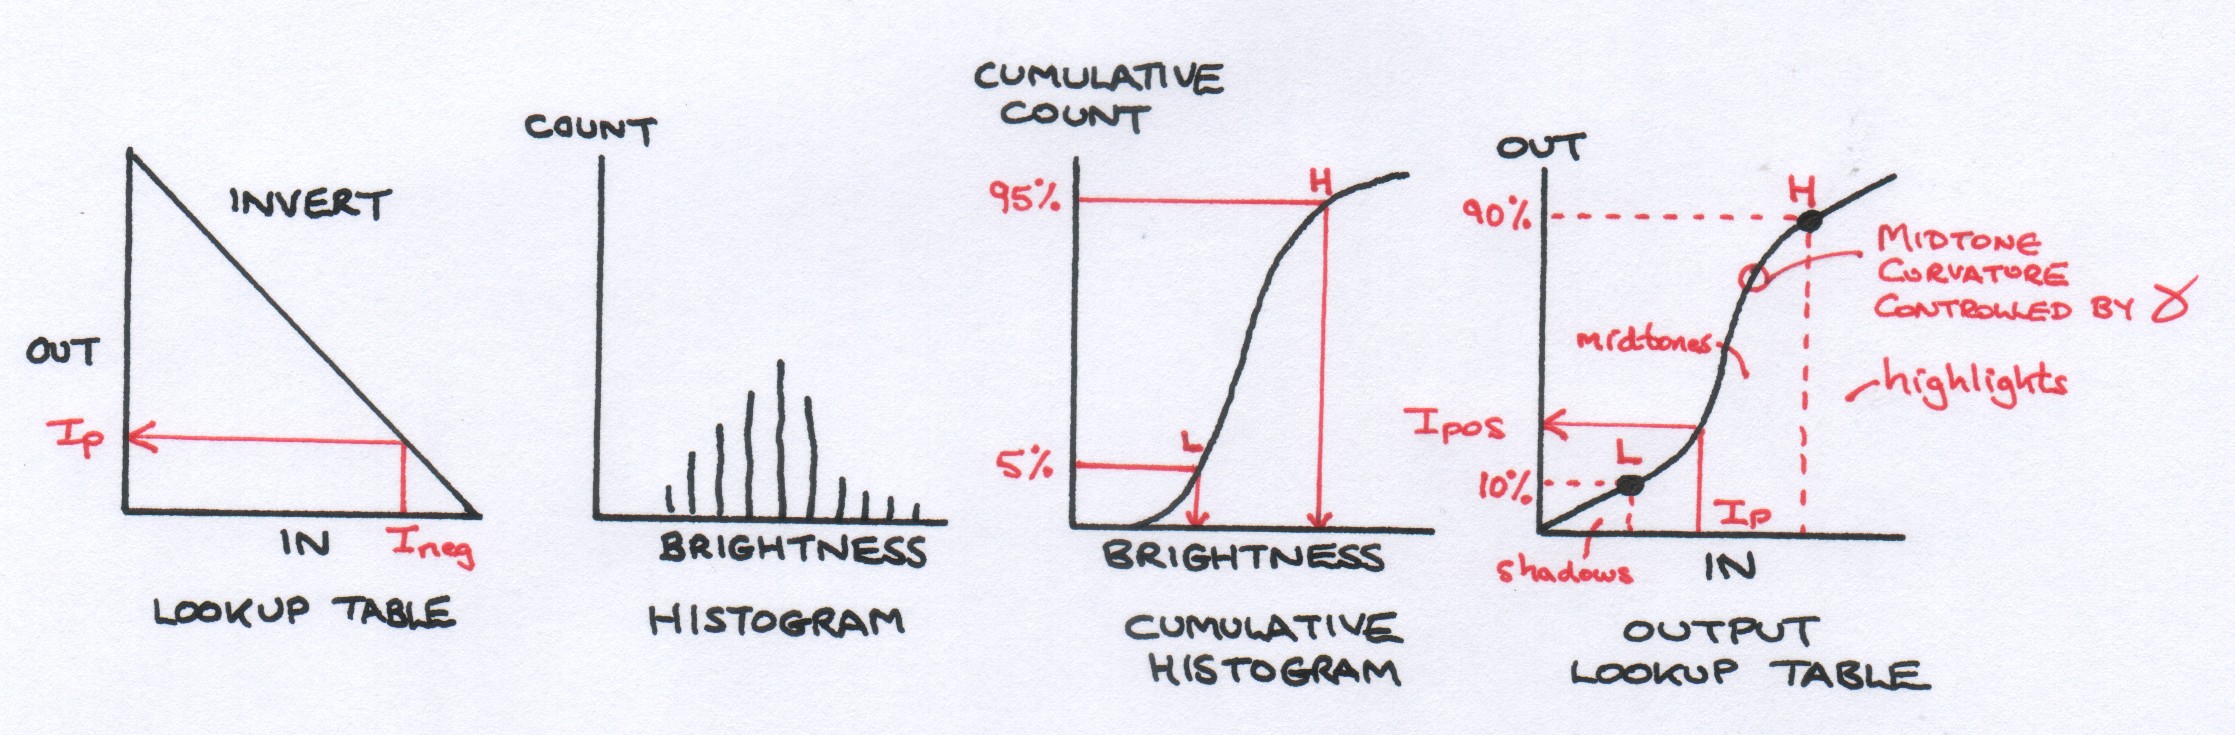
Trawling the Internet yielded a few suggestions involving using Photoshop (or a similar program) to invert the image
then to histogram
the colour channels. Then, adjusting the red, green and blue ranges manually to just encompass the actual range
shown on the histograms was said to give an acceptable positive version. That was useful, but manually doing that
to a several hundred scans was not my idea of fun.
Then I came across this paper:
- "Digital Processing of Scanned Negatives",
Qian Kin, Daniel Tretter,
Imaging Systems Laboratory,
HP Laboratories Palo Alto
HPL-97-16(R.1)
July 6th 2004
This outlined a process involving histograms, but which could certainly be automated.
Here is an overview of the more basic parts of the process:
I knocked up a quick implementation of this in Python using the Python Imaging Library.
You can download this implementation here
(you will also need this file).
It processes all JPEG files in a directory called negscans and
outputs the positive version of each of them in a directory called posscans.
It might be useful if you buy a "film scanner" which can't convert negatives to positives itself
for whatever reason. The results are good enough for my purposes, so the £25 was not wasted.
That said, what I am doing is definitely sub-optimal. All processing is done in 8 bits per colour
whereas the scanner is said to be capable of 10 bits. The ranges found from the 5% and 95% points
in the cumulative histogram can look worryingly small (i.e. not all of those 8 bits are
being used) ... but the results still look OK to me for the shots I have processed so far. What
we are doing here is what was once done with human intervention and judgement - printing negatives
to paper positives. The HP paper notes that they can't do quite as good a job as a traditional
finishing shop - even with the additional steps they do (which I don't do).
NOTE: All software on this site is licensed under the
MIT License. This is only
to formally state that there is no warranty and I am in no way liable for your use
of the software. You are free to modify it and use it in any way you like with the sole
exceptions of changing the license terms or removing the copyright notice. The MIT
License seems to be the most permissive there is, which is my intention.
I would prefer not to use any license, but I am told that might be unwise these days.
You will need a working Python environment and PIL to run it.
Go home ...